Less Than a Week and the Warranty Is Already Gone: Installing ZMOD on the AD5X
I had the AD5X for less than a week. I hadn't done a second print yet. And I was already on GitHub reading about ZMOD.
ZMOD is a community firmware mod for the Flashforge AD5X. It replaces the stock firmware with something you can actually get into: SSH access, Klipper-compatible configuration, a web interface, direct control over motion settings and calibration. The stuff that makes the printer feel like yours instead of a closed box you're borrowing from Flashforge.
Here's the full install, step by step. It's more involved than just copying one file. There are four phases, and skipping any of them causes problems.
This voids your warranty. Completely and immediately. ZMOD is a community project, not an official Flashforge product. If something goes wrong during or after this install, Flashforge support will not help you, and that's fair, because you chose to replace their firmware. Read through the full guide before touching anything. Understand what each step does. Make your own call. You're an adult, you own your printer, and whatever happens next is on you.
What You Need Before You Start
A USB drive. The wiki says 8GB or smaller. I used a 32GB and it worked fine, but I also just voided a week-old warranty on purpose, so take my risk tolerance with appropriate skepticism. Format it FAT32. Not exFAT. Not NTFS. FAT32.
You'll also need three separate files from the ZMOD releases page: the factory firmware package (AD5X-1.1.7), the ZMOD mod file (AD5X-zmod-*.tgz), and the activation file (AD5X-ENABLE-zmod.tgz). Download all three before you start. You'll use them in order.
And you need the printer's IP address. Check your router's device list or find it in the printer's network settings. You'll need it in Phase 3.
Phase 1: Get to the Right Firmware First
ZMOD installs on top of a specific factory firmware version: 1.1.7. If your printer is running something newer or different, ZMOD may not install correctly. This phase gets the printer to exactly the right baseline.
Step 1: Format the USB drive to FAT32
Start with a clean, formatted drive. Even if it was already FAT32, format it fresh.
Step 2: Copy the factory firmware to the USB root
Take the AD5X-1.1.7 package and copy it to the root of the drive. Not in a folder. The root. The printer doesn't go looking in subdirectories.
Step 3: Power off, insert USB, power on
Shut the printer down completely using the back power switch. Insert the USB drive, then power back on. The printer will detect the firmware file and start flashing automatically.
You'll see the Flashforge boot logo, and then within a few seconds the upgrade screen appears.

Leave it alone. Don't touch anything. The printer will work through the main firmware flash and then an MCU upgrade. Both show the same spinning indicator. Both will tell you not to cut the power. Listen.
Step 4: Upgrade complete, unplug and restart
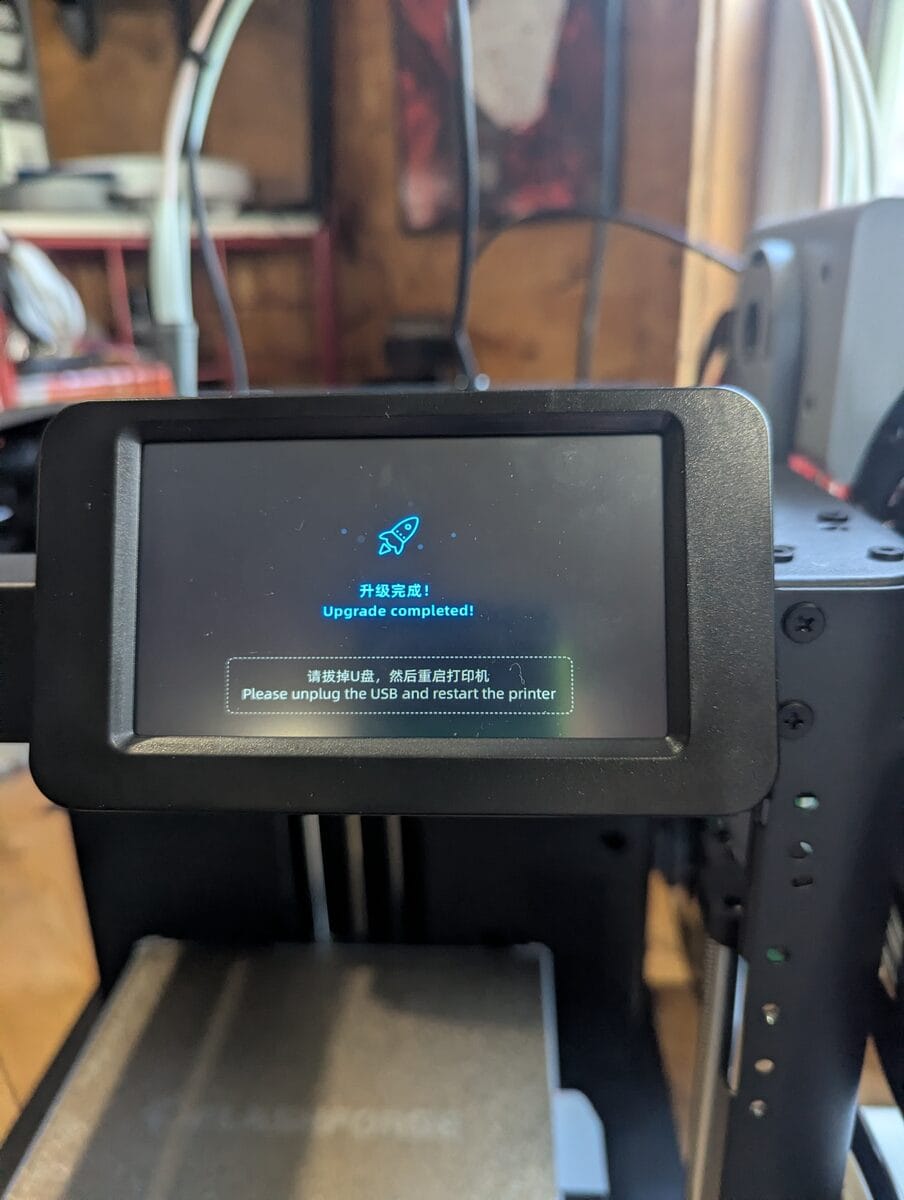
When it finishes you'll see the rocket icon and a prompt to unplug the USB and restart. Do that. The printer will come back up on 1.1.7. You can verify the version in the settings menu if you want to be sure before moving on.
Phase 2: Install ZMOD
This is the main event. Same process as Phase 1, different file.
Step 1: Put the ZMOD file on the USB drive
Format the drive again for a clean slate. Copy the AD5X-zmod-*.tgz file to the root of the drive.
Step 2: Power off, insert USB, power on
Same as before. Power off, plug in the drive, power on. The printer detects the ZMOD installer and starts automatically.
This time you'll see the ZMOD installer screen specifically:
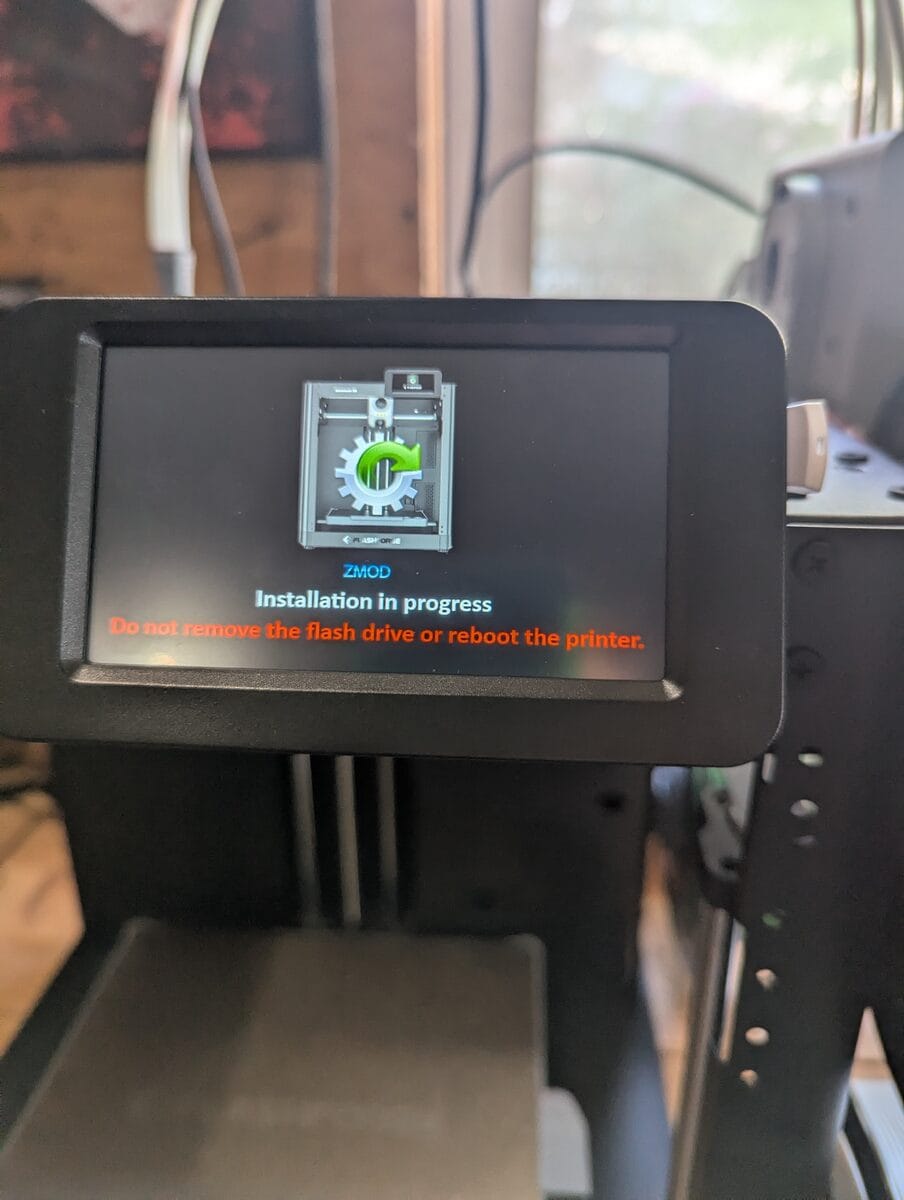
Do not remove the flash drive. Do not reboot the printer. The screen says this in red. The wiki says this takes up to 40 minutes. Mine was faster, but I stayed out of the way regardless.
Step 3: Remove USB, power cycle
When it's done, the printer will prompt you to remove the USB drive and restart. Do that.
If you see the ZMOD logo on boot, the install worked. If the printer boots straight back to the Flashforge UI, move on to Phase 3 because you're not done yet.
Phase 3: Activate ZMOD
This one caught me. ZMOD installed fine, but the mod didn't actually load after the first reboot. The printer booted into the ZMOD screen, but the web interface wasn't there and nothing had changed. Turns out there's a separate activation step.
Step 1: Copy the activation file to the USB drive
Take the AD5X-ENABLE-zmod.tgz file, copy it to the root of a FAT32-formatted USB drive.
Step 2: Power off, insert USB, power on
Same as every other step. The printer detects the activation file and runs it. Another round of upgrading screens. Another round of not touching anything.
Step 3: Access the web interface
Once the printer comes back up, open a browser on any device on the same network. Type in the printer's IP address. If ZMOD is active, you'll land on the ZMOD web interface. That's your confirmation it worked.
This cost me an hour. Five reboots, each one ending in an emergency stop that killed the firmware mid-initialization. I could not figure out why the printer kept dying on startup until I pulled the logs and saw what was happening: the browser's active connection to the web interface triggers an emergency stop when the printer restarts. The printer comes up, sees an open connection, and halts itself as a safety measure before it's finished booting.
Every time you reboot the printer, close the browser tab first. Completely closed. Not minimized. Not in the background. Closed. Then reboot. Then reopen the browser after it's back up. This applies to the activation reboot, the firmware update reboots, and any other time you restart the printer while ZMOD is installed.
Phase 4: Update Everything
Once you're in the web interface, go to Settings, then Firmware Updates. Check for updates and install everything it finds. ZMOD maintains its own update channel and the version that installs from the USB may not be the current release.
While you're in there, set your language. In the console, type LANG LANG=en if the interface defaulted to something else. Then go through the configuration screens, click Ok or Reboot when prompted, and let it finish its initial setup.
Optional: Recalibrate XY Offset
If your print head positioning is off after the install, the ZMOD wiki includes a calibration utility. Download Set.XY.Offset.zip, unzip it to the USB root, and run it the same way as everything else: printer off, USB in, power on. The calibration interface walks you through resetting the XY offset manually.
Mine didn't need it. Yours might.
What You Have Now
SSH access. A web interface. Direct Klipper configuration. The ability to actually see what the printer is doing and change it without waiting on a firmware update from a manufacturer's schedule.
The Flashforge warranty is gone. I've had this printer for less than a week and I have no regrets. If it's going to live on my bench and print my parts, I want to understand what it's doing. Stock firmware is fine right up until it isn't, and by then you're at the mercy of someone else's roadmap.
ZMOD puts the control back where it belongs.