Back in October of 2018, almost immediately after being laid off, I finally achieved a long time goal of getting my ticket punched. Since then I have been a proud owner of a general class amateur radio license. While I greatly enjoy being able to broadcast, passively listening to all of the devices around me has become something of a passion. While the FCC license is not required to listen, studying for the exam shored up my knowledge on antenna theory and provided a path to build my own antennas tuned to the frequencies I wished to capture.
Over the past weekend, an interesting topic arose. Medical/emergency pagers are still used nationwide: Can we receive these signals and decode them using an approximately $20 RTL-SDR adapter? Some quick research revealed that the software exists, and it is incredibly easy to do. Let’s get started. I am starting out with a fresh install of Raspbian Stretch Lite available at https://www.raspberrypi.com/software/operating-systems/ , a Raspberry Pi Model 2, and the NooElec NESDR Smart. The same process can be done with any variation of the Raspberry Pi, you will most likely require a powered USB hub to use the SDR.
I won’t go into the details of writing the image to an SD card, nor setting up the pi to be accessed headless with networking enabled on first boot, as that has been covered more times than I care to count, although I do need to lookup the formatting of the wpa_supplicant file on each new install (note: keep a copy for future use).
After the initial boot and required resizing of the file system, log in over ssh without having the SDR plugged in. As always, we want to update our fresh install so that we aren’t pulling in outdated packages. Connect via SSH and update. This is done with “sudo apt update && sudo apt upgrade -y && sudo apt dist-upgrade -y”. Sit back, relax, and wait approximately 20 minutes for this all to complete.
Once the updates are complete, I like the first this I install to be screen. This allows me to continue where I left off, even if my WiFi drops for some reason. The key thing is to remember to launch “screen” on login, and if disconnected use “screen -r” on re-connection. This will allow the install to continue if you get disconnected.
The next step is to install all of the software required to build our packages. Some distributions may include multimon-ng as a download in their package manager, however I like to have the bleeding edge version and this means compiling from source. Let’s go ahead and install all of the packages that we will need to run everything. To install the prerequisties, type “sudo apt install git cmake build-essential libusb-1.0 qt4-qmake libpulse-dev libx11-dev qt4-default -y”. Sit back and await completion of the install.
Once this is done, we can get to the fun part. Create a new directory in your home folder to hold all of the source code you will be getting. this can be called sdr, source, src, or whatever you like. I’m going to use source, because I like descriptive names. To make the directory and enter it in one line “mkdir ~/source && cd ~/source”.
Next we are going to build our rtl-sdr drivers and blacklist the default ones built into the kernel. The source code for the rtl-sdr driver we want to use, as well as some additional useful programs for providing a raw datastream from the SDR is available at https://github.com/osmocom/rtl-sdr. To pull it to our Pi easily we use “git clone https://github.com/osmocom/rtl-sdr”. Things will happen and when done, a new folder appears called rtl-sdr. Next, change to the rtl-sdr directory with “cd rtl-sdr” and make and change into a new directory called build with “mkdir build && cd build”. Now inside the build directory we can use cmake to create a makefile; this is done with the command “cmake ../ -DINSTALL_UDEV_RULES=ON” the -DINSTALL_UDEV_RULES=ON tells cmake to create a makefile that will include udev rules for our adapter. Once this is done, run “make” then “sudo make install” and finally “sudo ldconfig” to add the udev rules to the system. This should blacklist the default drivers, but to be sure, I like to “sudo nano /etc/modprobe.d/blacklist.conf” and add the following, each on a new line: “blacklist dvb_usb_rtl28xxu”, “blacklist dvb_core”, “blacklist rtl2830”, and “blacklist dvb_usb_v2”. Use CTRL+X to exit nano, type “y” and press enter to save.
Next we are going to get the source and compile multimon-ng. We are going to go back to our source directory using “cd ~/source” and we will get the source code from https://github.com/EliasOenal/multimon-ng using git clone again like so, “git clone https://github.com/EliasOenal/multimon-ng”. Once that is done, “cd multimon-ng && mkdir build && cd build” to enter the directory git created, make a build directory inside that directory, and finally change into the build directory. For this program, we are going to rely on qmake as the author provided a .pro file to help automate the build. To invoke this use “qmake ../multimon-ng.pro” and patiently await the creation of the makefile. Once complete run “make” followed by “sudo make install”.
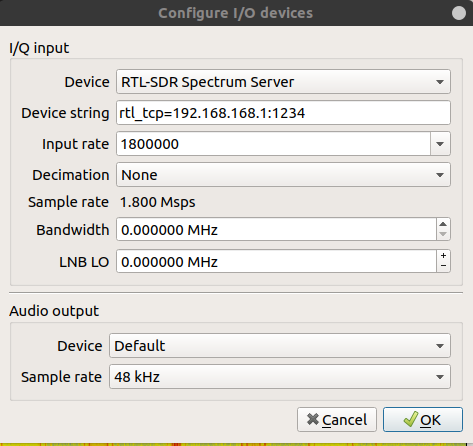
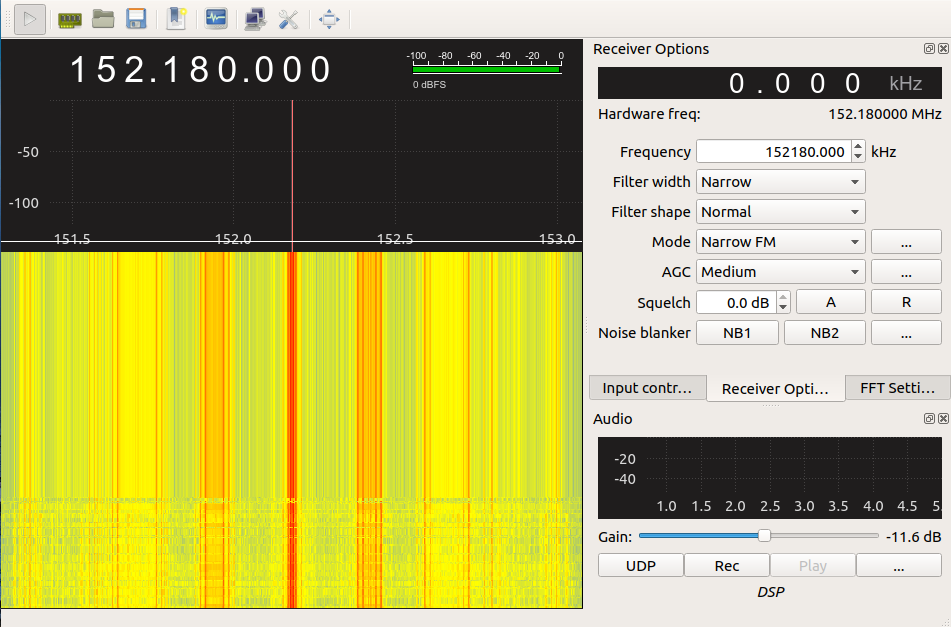
With all of the required programs installed, we can now start listening for pager traffic. The best way I have found to locate the frequencies (which vary based geographic location) is to use the SDR along with a program that provides a waterfall display. You can check https://www.sigidwiki.com/wiki/POCSAG for frequency lists of where pagers operate. Using the waterfall, you can home in on an interesting frequency and use that in rtl_fm to feed to multimon-ng. An example of this would be a command like “rtl_fm -f 152.180M -s 22050 | multimon-ng -t raw -a POCSAG512 -a POCSAG1200 -a POCSAG2400 -f alpha /dev/stdin >> ~/page.txt”. Breaking down this command, rtl_fm is used to control the SDR, the -f sets the frequency to the frequency entered (here it is 152.18 MHz) -s sets the sample rate to the entered value, the | sends the output to multimon-ng the -t tells multimon-ng that we are providing raw data, the -a switches tell multimon-ng to attempt to decode POCSAG512, POCSAG1200, and POCSAG2400 (different types of pager encodings, we could also include -a FLEX which is another pager encoding), the -f alpha /dev/stdin tells multimon-ng that we only want the alphanumeric data reported to stdin and the >> ~/page.txt writes the data to a text file in the home directory called page.txt. In more simple terms, rtl_fm tunes the dongle, then we pipe that to multimon-ng, multimon-ng then sends the decoded information to a text file.
Good luck with your decoding, and hopefully all the messages don’t read, “Be sure to drink your Ovaltine.”